Friday, October 29, 2010

Off his trolley?

Here is a picture of a magnet we have in the kitchen...


Zachary looked at it yesterday and asked "who's that pushing his trolley!"

Monday, October 25, 2010

Yes, I am working through the cake section of my cookery book!

Today's effort - Mocha Cake :


Hmmm, the 'easy chocolate curls' (not described here but detailed in the book) turned out as 'easy chocolate dust,' and my butter was far too soft for the icing (you can see how it's seeped out the end of the cake!), but otherwise a very delicious cake.

175g self-raising flour
50g cocoa powder
225g soft light brown sugar
175g butter, melted
4 medium eggs, separated
60ml very strong coffee, cooled
3 tbsp water

Icing :
100g butter, softened
200g icing sugar
1 tbsp water or milk
2-3tbsp very strong coffee, cooled
1. Preheat the oven to 190C/170C fan/gas 5. Oil and line a 2lb loaf tin with parchment paper (yay! finally a chance to use my Lakeland loaf tin liners and they performed brilliantly!) so that it comes over the sides of the tin. Sift the flour and cocoa powder into a large bowl, add the sugar and stir to combine.

2. Using a wooden spoon or a hand-held whisk, beat in the melted butter, egg yolks, coffee and water until smooth.

3. Whisk the egg whites in a large clean bowl until fairly stiff peaks form, then gently fold into the cake mixture in three batches making sure there are no lumps of egg white left.

4. Turn the mixture into the prepared loaf tin and smooth the surface. Give the tin a tap to remove any air bubbles. Bake in the oven for 35 minutes, then reduce the oven temperature to 160C/gas 3 for the last 20 minutes or until a skewer inserted into the middle comes out clean. As I use a fan oven, I reduced the heat to 140C (I usually reduce by about 20 degrees) - however the cake then took a further 40 minutes to cook, rather than the 20 described in the recipe. This sort of thing has happened before, and I wonder whether if the oven temperature reduces below a certain point, I either don't need to reduce it so much, or don't need to reduce it at all.

5. Allow the cake to cool in the tin for 10 minutes then lift out by the parchment paper onto a wire rack to cool completely.

6. Make the icing - Place the butter in a large bowl and beat it thoroughly with a wooden spoon until it is very soft. Add the sifted icing sugar and coffee and beat until smooth (as my butter was so soft I didn't need any milk, and even had to add more icing sugar to get it to a consistency where it would actually stay on a cake!). When the cake is cold, remove the parchment paper. Using a breadknife, split the cake horizontally (I also removed the top as it was no way flat enough for the runniness of my icing) and spread about a third of the icing on the lower half. Place the other half of the cake back on top and spread the rest of the icing over it.

7. Decorate as desired - it's best to leave the cake for 30 minutes to settle before cutting.

Okay Rachel Allen - Italian Hazelnut cake next...

Saturday, October 16, 2010

Poppy Seed cake

Saw a lovely looking poppy seed cake in Rachel Allen's "Bake" and thought I'd try it today. Firstly, 75g of poppy seeds seem a massive amount!!! The cake went well, although I wasn't sure it had risen as much as it should. That said, it didn't look too different from the picture in the book. The buttercream icing was interesting though - it's essentially a custard whisked into butter. My very helpful and talented sous chef made the custard for me, and the icing came out really well - it tastes very buttery, but creamy, not greasy. I find that when I'm making regular butter icing (butter and icing sugar), if it's too buttery, it just tastes wrong, but this icing here is great and much lighter. Although it was only when typing out the recipe this evening I realised that I had told Leigh to use 3 egg yolks, rather than the 2 of the recipe! Extra rich then!

Here is the cake uniced
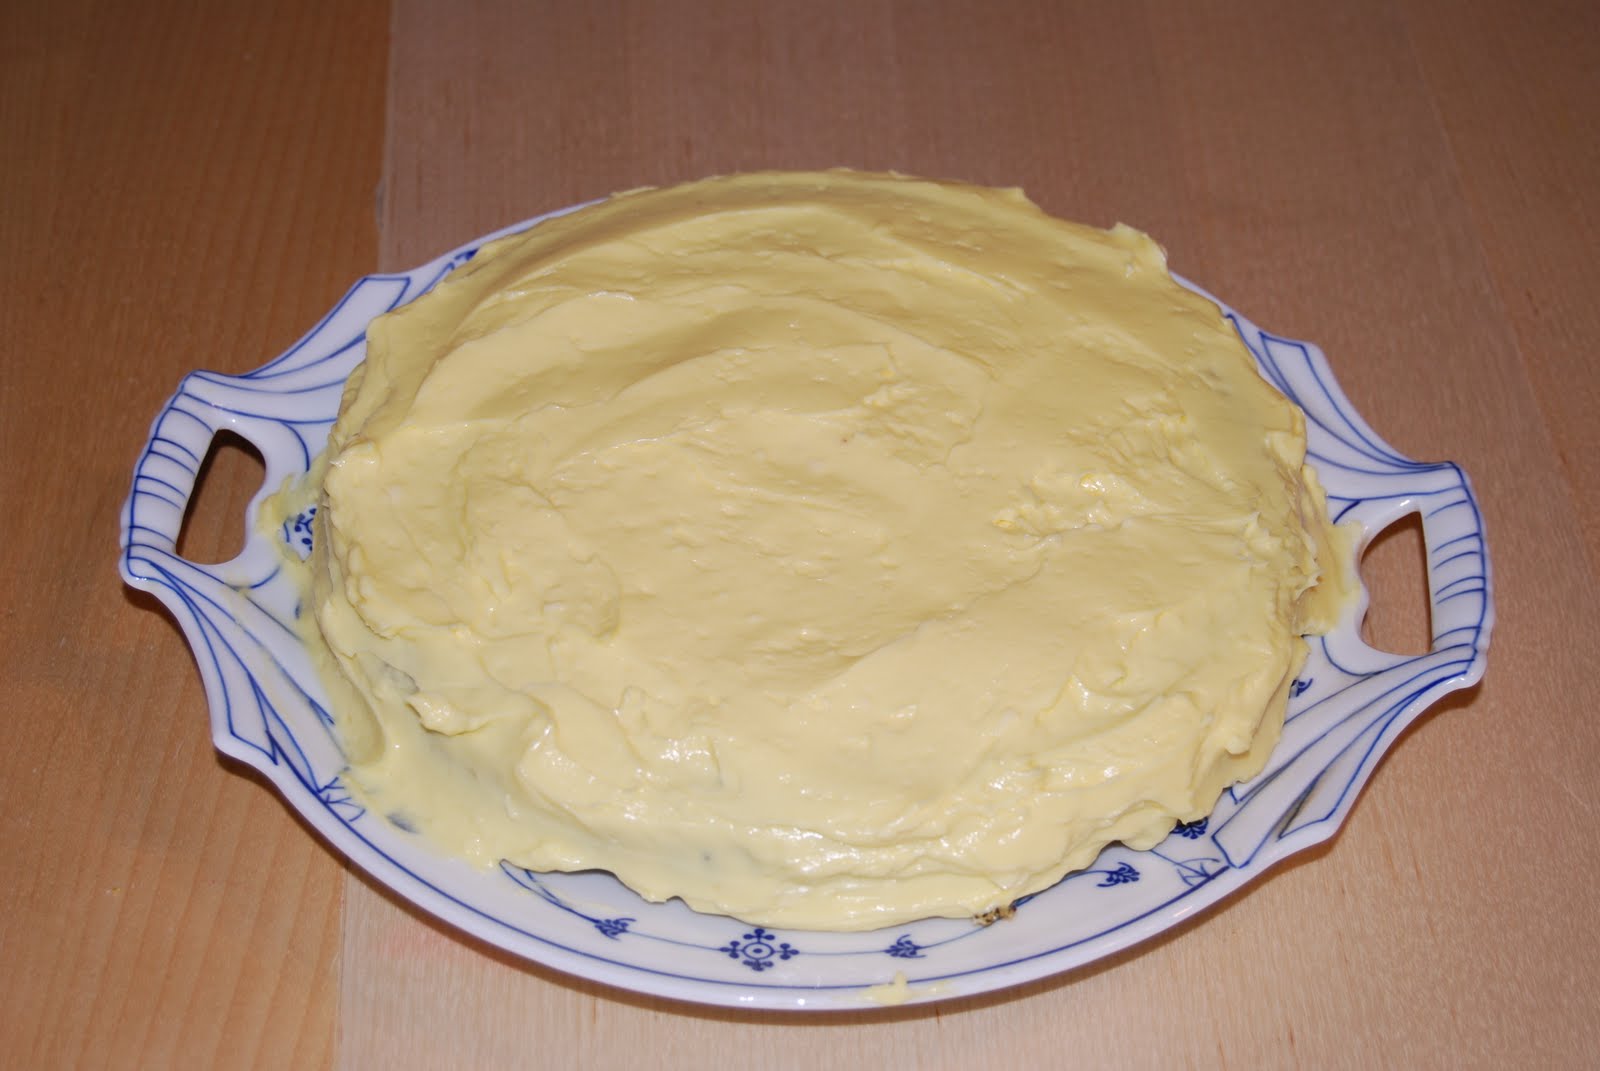


Iced


And cut open to show the inside.


The poppy seeds give it a grainy texture and a very distinctive flavour, and the icing is a great complement to it.

I have also been spending time making more Caralot goodies this evening instead of ironing...this time, cushions!


I need to tell Jamie that his branding is definitely working - Zachary can recognise the colour and 'a' at 50 paces!

And finally, Zachary was taking some photos from the kitchen table while we were clearing up after dinner tonight - he got this great one of Leo enjoying an apple.


(Rachel Allen - Bake)

150g butter, softened
100g caster sugar
3 eggs, beaten
100g plain flour
1 tsp baking powder
75g poppy seeds
Icing :
150ml milk
125g caster sugar
2 egg yolks
175g butter, softened
1 tsp vanilla extract (i did not use this as had some vanilla sugar in the cupboard - a jar of caster sugar with an old vanilla pod inside).

1. Preheat the oven to 170C/150C fan/gas 3. Butter the sides of a 20cm spring-form/loose-bottomed tin and line the base with greaseproof paper.

2. Cream the butter in a large bowl or in an electric mixer until soft. Add the sugar and beat until the mixture is light and fluffy. Gradually add the beaten eggs, beating well between each addition.

3. Sift in the flour and baking powder, add the poppy seeds and stir until combined.

4. Spoon the mixture into the prepared tin, making a slight hollow in the centre with the back of a spoon. Bake in the oven for 25-28 minutes or until it is cooked in the centre and a skewer comes out clean.

5. Allow the cake to stand for 5 minutes before carefully removing it from the tin and transferring to a wire rack to cool.

6. Make the vanilla buttercream icing : Place the milk and sugar in a small saucepan and bring to a gentle boil, stirring to dissolve the sugar.

7. Whisk the egg yolks in a small bowl, then pour the milk onto the yolks, whisking continuously. Return the mixture to the pan and cook over a low-medium heat, stirring all the time with a wooden or silicone spatula until it thickens and the mixture just coats the back of a spoon - this may take about 10 minutes. Do not allow the mixture to get too hot or it will scramble (if it does, quickly remove from the pan and pass through a sieve). Pour into a bowl or jug and allow to cool slightly.

8. Meanwhile, place the butter in a bowl (I did this in an electric food mixer) and whisk until soft and light.

9. Gradually add the almost cooled (not cold, but room temperature is fine) custard to the butter, whisking all the time until it is combined. Add the vanilla extract and mix. Cover the top and sides of the cake with the icing and serve.

Thursday, October 14, 2010

Cakes Galore

So the Christmas cake is now cooked and in storage for the big day - must remember to feed it this year....


I've also made a cake for my brother-in-law with his new business' logo on it. This is the full logo


- I was intending to make a rectangular cake with the full name on, but then saw how much mixture I'd need for a 10" square cake. Yep, so decided to stick to a regular Victoria sponge. And the full name was dropped - my plan was to use thick water icing and pipe the name on, but to be honest, my icing skills are few and far between and the last time I tried to write a name on this size of cake, I started off way too big and the end of the word looked ridiculous!!!! Leigh's suggestion was to just stick to the car logo and it doesn't look too bad. A couple of things though - turning a pack of white royal icing black is not as easy as I thought it would be. Took about half a bottle of colouring to actually get to black - dirty grey was no problem, but black more difficult! And because of the extra liquid being added, the icing became really sticky and unmanageable and I had to keep adding icing sugar. I think it came out okay in the end though.

Sunday, October 10, 2010

Nigella

Watching a Nigella Kitchen from the other night - she's showing us to make a magnificent looking cheesecake and describes how it should look once baked - there should be an inner thigh wobble. Oooooo!

Day at home

We decided to have a quiet day at home today to recover from the festivities yesterday, but still managed to get a remarkable amount done.

I got my fruit macerating for my Christmas cake (macerating is an odd word - sounds vaguely rude or threatening, depending on the mood!)...


peeled and cored a shedload of apples from Leigh's parents' garden. I was going to puree them all up for Leo, but I also made him another batch of dinners (chicken with winter vegetables) today and wouldn't have had enough freezable containers. So the apples have just gone into bags and into the freezer ready for pies/crumbles/anything else appley which grabs us.

And made a Raspberry Bakewell slice which is delicious! Pics to follow. Leigh was also busy - planted up all his bulbs with Zachary this morning, then turned a load of tomatoes from his parents' garden into a pasta sauce for tomorrow, made Mexican strawberry jam (it's got limes in it) with the fruit we had in the freezer, and then turned out a fab risotto for dinner. In between all this we managed to watch Up with Zachary, play a bit of Wii golf and 'supervise' him doing some gluing. Yes, the kitchen is now covered in glitter!


Raspberry Bakewell Slice

375g pack sweet shortcrust pastry (I made my own - the recipe is at the end)
5 tbsp thick seedless raspberry jam (I didn't have any in and used our homemade summer fruits jam instead - strawberry, raspberry, blackcurrant and gooseberry)
100g/4oz frozen raspberries, just thawed (I missed these out altogether as had none!)
25g flaked almonds
4 tbsp apricot jam
Sponge :
200g butter, very soft
200g golden caster sugar
100g ground almonds
100g self-raising flour
1 tsp baking powder
1/2 tsp almond extract
4 eggs, beaten

1. Heat oven to 200C/180C fan/gas 6. Line the base and sides of a buttered traybake tin, about 18-20cm x 30cm, with baking parchment. Roll out the pastry to line. Lift into the tin and evenly press right into the corners. Prick with a fork and chill for 20 mins.

2. Bake the pastry for 8-10 mins until it's cooked but not too coloured. Cool for a few mins and turn down the oven to 180C/160C fan/gas 4. Dot the jam over the pastry (there's no need to spread) and scatter over the raspberries.

3. For the sponge, put all the ingredients into a large bowl and beat with an electric whisk until soft and very well mixed. Spoon this over the raspberry layer then smooth evenly. Scatter over the flaked almonds and bake for 35-40 mins until golden and firm. Cool completely in the tin. (Will freeze for up to 3 months - overwrap the tin with baking parchment and foil beforehand).

4. To serve, thaw for 4 hrs at room temperature then reheat in a low oven. Melt the apricot jam with 1 tbsp water and brush over the top of the sponge just before serving.

Sweet Shortcrust Pastry

200g plain flour
1 tbsp icing sugar100g chilled butter, cubed
1/2 - 1 egg, beaten

Place the flour, icing sugar and butter into a food processor and whiz briefly. Add half the beaten egg and continue to whiz. You might add a little more egg, but not too much as the mixture should be just moist enough to come together. Flatten out the ball of dough until it is about 2cm thick. Wrap in cling film and chill in the fridge for about 30 mins.


Can't wait to try it with custard!

Cracking wedding

So, the wedding for which I stitched the Lowry picture was yesterday and it was truly fab. It was my first civil partnership ceremony and I had a brilliant day. The boys were invited too so we decided to take them with us - it was a bit tiring as you tend to forget as an adult how much waiting around there is and how long they'll have to sit for at the meal, but they were both really well behaved and had an excellent time. Zachary in particular made friends with Rose and Alfie, both of whom shared his passion for stone throwing!

The ceremony was punctuated by live music from a great singing group (much better than CD/iPod option) and it all went very smoothly (despite Zachary managing to remove an handle from a cupboard in the venue which was situated right by my chair and Leo banging his head on the same cupboard as he slightly toppled into it...but disaster averted, no crying!). It turned out that I was one of the witnesses - I put it like that as the first I knew of this was when the Registrar announced that I was one of the witnesses! But we were all friends there and it was all very relaxed. Leigh was best man and gave a speech during the meal, which went down very well (both meal and speech!), and Leo ate his own body weight in food I'd brought from home and pickings from my plate. The cake was designed especially for the couple, incorporating representations of their hobbies and passions, and it was something very special indeed (tasted good too!).

I drove the boys home for bed after the meal - the turnaround took about 2 hours but it was worth it and I was glad I did it. Didn't manage to get a dance in unfortunately, but I was able to witness the might of all the men dancing a fertility dance - which included steps like dancing as a bear, rubbing your back against the wall, and rubbing bums with the man next to you. I think Leigh was glad it was someone he knew!!!! All very virile and manly.

Marvellous day.

Thursday, October 07, 2010

Lowry cross stitch

I've just completed a cross stitch picture of a CS Lowry painting - Street Scene. I have really, really enjoyed this project and decided to try and take a photo each week to see how it was taking shape. I've uploaded everything to Flickr here, so I thought I'd just put the link here rather than set out all the piccies again. But here it is after week 1


Once the cross stitching was complete and the back stitch still left to do


And all complete and framed.

Sunday, October 03, 2010

Uncle Becki

Have had a great weekend being visited by my sister, her husband and little girl. Zachary well has the hang of 'uncle Jamie,' and 'uncle Ralph,' but seemed a little confused with Becks. Often he called her 'uncle Becki,' and sometimes it even came out sounding more like 'auncle Becki!' Hilarious!